
Candlestick Pattern Mastery
Beyond basic patterns, this lesson covers the multi-candle formations that institutional traders actually use, with context that determines whether a pattern will work or fail.
Pattern Context (Most Important)
Why Most Patterns Fail
- A pattern without context is just candles on a chart
- The SAME pattern can be bullish or bearish depending on location
- Context factors that matter:
1. Where is the pattern in the trend?
2. Is it at support/resistance?
3. What is the volume doing?
4. What timeframe is it on?
Location Rules
- Reversal patterns ONLY work at key levels
- A hammer in the middle of a range = meaningless
- A hammer at a major support with confluence = high probability
- Always check where the pattern forms FIRST
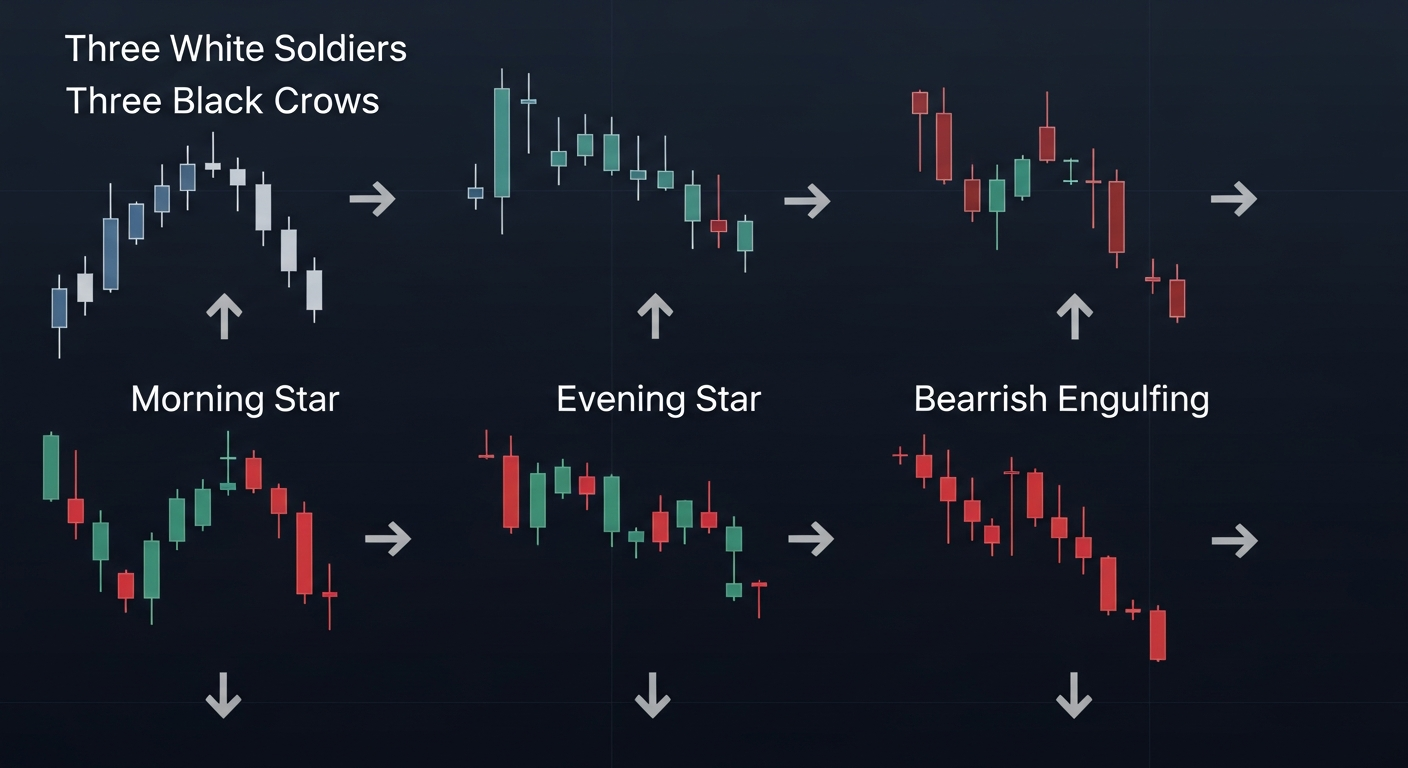
Three White Soldiers / Three Black Crows
Three White Soldiers (Bullish)
- Three consecutive strong green candles
- Each opens within previous body
- Each closes at or near its high
- Bodies should be roughly equal size
- Best at support after downtrend
Three Black Crows (Bearish)
- Three consecutive strong red candles
- Each opens within previous body
- Each closes at or near its low
- Best at resistance after uptrend
Quality Check
- Bodies should have minimal shadows
- Declining volume on third candle = potential weakness
- Fourth candle color matters for confirmation
- Ignore if candles are very small
Three Inside Up / Down
Three Inside Up (Bullish)
- First candle: Large bearish candle
- Second candle: Smaller bullish candle INSIDE first candle range
- Third candle: Bullish candle closing above first candle high
- Shows selling exhaustion turning to buying
- Strong signal at support levels
Three Inside Down (Bearish)
- First candle: Large bullish candle
- Second candle: Smaller bearish candle inside first candle range
- Third candle: Bearish candle closing below first candle low
- Shows buying exhaustion turning to selling
- Strong signal at resistance levels
Abandoned Baby
Bullish Abandoned Baby (Rare, Powerful)
- Strong bearish candle in downtrend
- Gap down doji (gaps below previous close)
- Gap up bullish candle (gaps above doji)
- The doji is isolated by gaps on both sides
- One of the most reliable reversal signals
Bearish Abandoned Baby
- Strong bullish candle in uptrend
- Gap up doji
- Gap down bearish candle
- Very reliable reversal at tops
- More common in stocks than forex (due to gaps)
Rising and Falling Three Methods
Rising Three Methods (Continuation)
- Strong bullish candle
- Three or more small bearish candles (flag)
- Small candles stay within the range of the first candle
- Final bullish candle closes above the first candle high
- Signals the uptrend will continue
Falling Three Methods
- Strong bearish candle
- Three or more small bullish candles
- Small candles stay within range of first candle
- Final bearish candle closes below first candle low
- Signals downtrend continuation
Tweezer Tops and Bottoms
Tweezer Bottom (Bullish)
- Two candles with identical (or nearly identical) lows
- First candle bearish, second candle bullish
- Same low tested twice and rejected
- Stronger at support levels
- The more exact the low match, the stronger
Tweezer Top (Bearish)
- Two candles with identical highs
- First candle bullish, second candle bearish
- Same high tested twice and rejected
- Stronger at resistance levels
Trading Patterns Professionally
Entry Rules
- Identify the pattern
- Check location (must be at key level)
- Check volume (should increase on signal candle)
- Enter on close of pattern or next candle open
- Stop loss beyond pattern extreme
Timeframe Hierarchy
- Daily patterns most reliable
- 4-Hour patterns good for swing trading
- 1-Hour patterns for day trading (need more confirmation)
- 15-Minute and below: Only with additional confluence
Risk Management
- Stop loss: Beyond the pattern high/low
- Target: At least 1:2 risk-reward
- Wait for pattern completion before entering
- Do not anticipate patterns (let them complete)
Key Takeaways
- Context and location matter more than the pattern itself
- Multi-candle patterns are more reliable than single candles
- Volume confirmation increases accuracy significantly
- Higher timeframes produce more reliable patterns
- Always combine patterns with support/resistance levels
Lesson Discussion